
How to put many photos on one catalog page
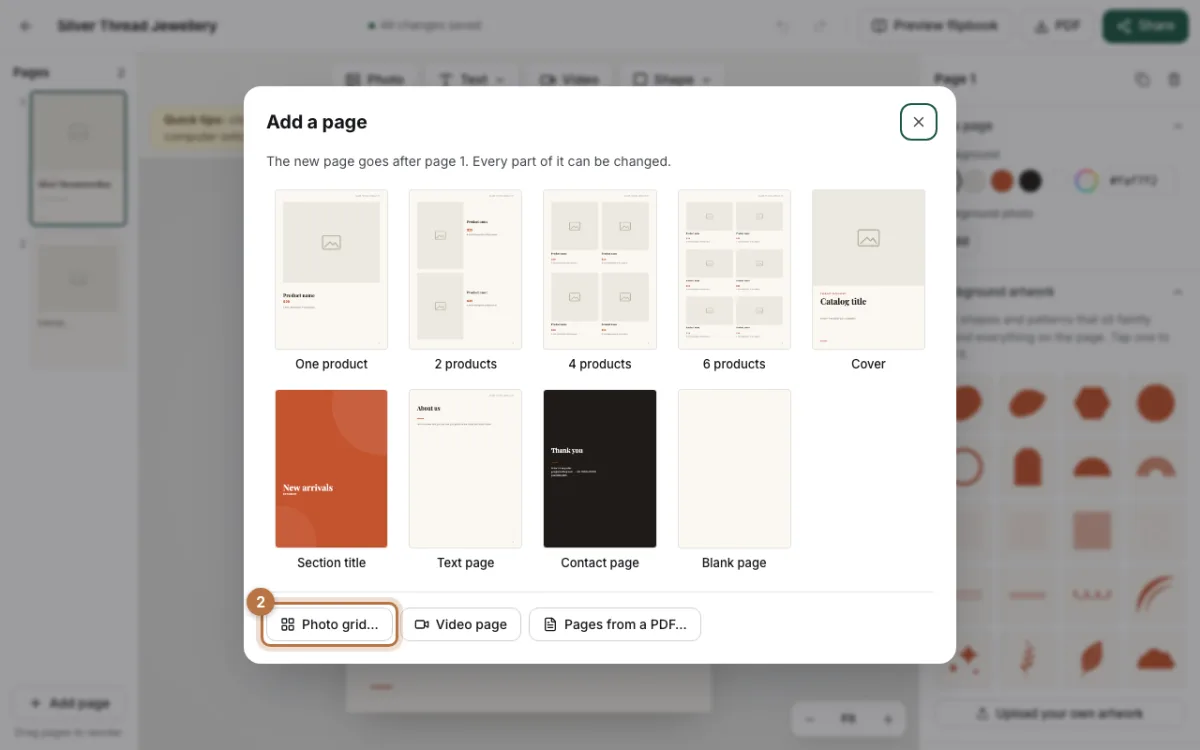
In the editor, click Add page, then Photo grid, and choose your photos. Pick how many go across and down, type a name under each photo, and click Add page. CatalogLeaf lines them up in a neat grid.
Sometimes one product on a page is too much. You may have many small items, like rings, cups or soaps. A photo grid catalog page shows many photos together, in neat rows.
CatalogLeaf has a tool for this. You choose your photos and say how many go on each page. It lines them all up for you, at the same size. In this guide we make a page with six pieces of jewellery.
What you need:
- A catalog open in the CatalogLeaf editor. To start a new one, open the app and click Design from scratch.
- The photos you want on the page. Phone photos are fine.
Step 1: Click Add page
Look at the list of pages on the left. Click Add page at the bottom of the list.

Step 2: Choose Photo grid
A window opens with ready-made pages. At the bottom, click Photo grid… and choose your photos. You can choose many photos at once.
Step 3: Pick how many photos go on each page
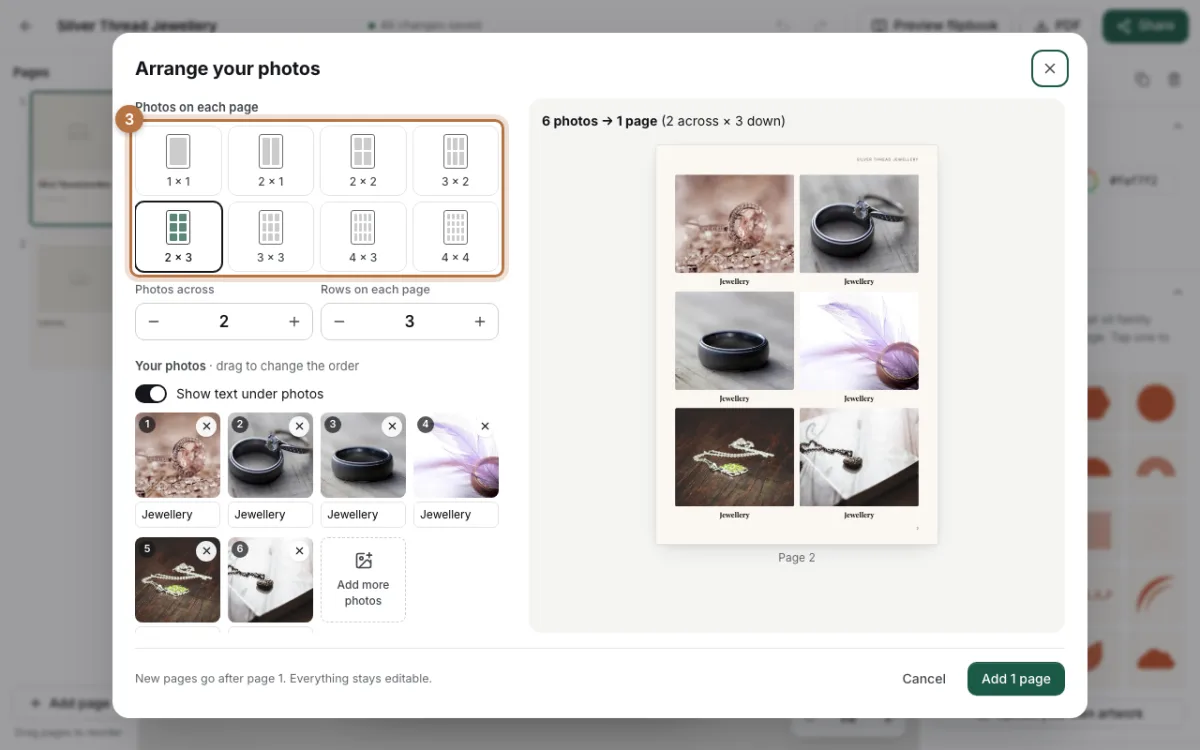
At the top, pick a grid. For example, 2 × 3 means 2 photos across and 3 rows down. That is 6 photos on each page.
You can also use the + and − buttons to set the number across and down. The preview on the right shows your page right away.
Step 4: Type a name under each photo
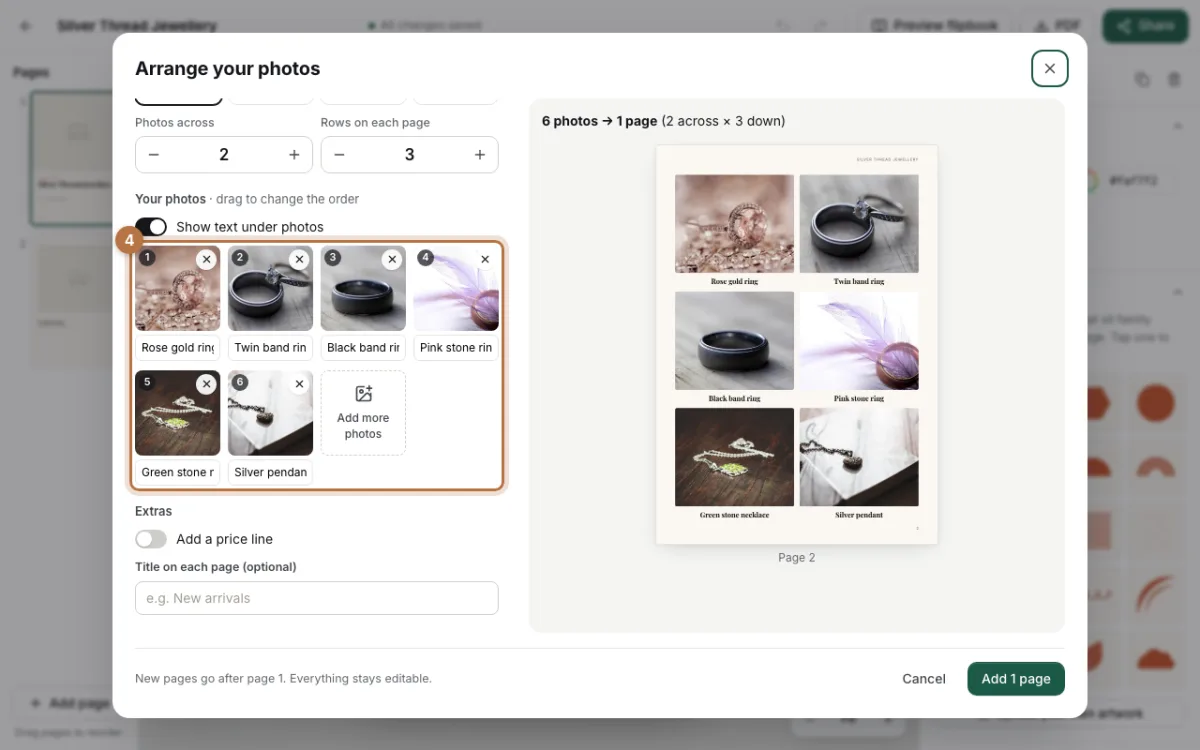
Under each photo there is a small box. Type the product name there. If your photo files have good names, like silver-ring.jpg, the name is already filled in.
Drag a photo to change its place in the grid. Click the small x to remove a photo. Click Add more photos to add more.
Step 5: Add prices and a page title
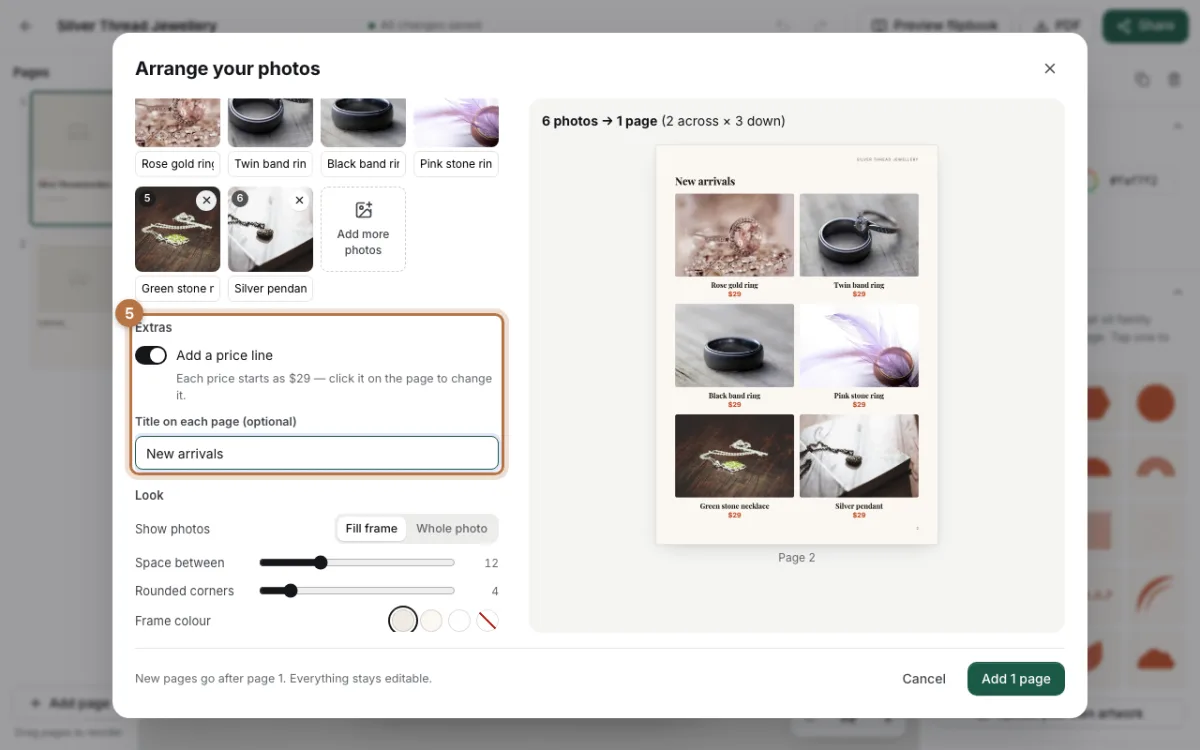
Under Extras, turn on Add a price line. Each photo now gets a price under its name. Every price starts with the same example amount. You change each one on the page later.
You can also type a title for the page, like "New arrivals".
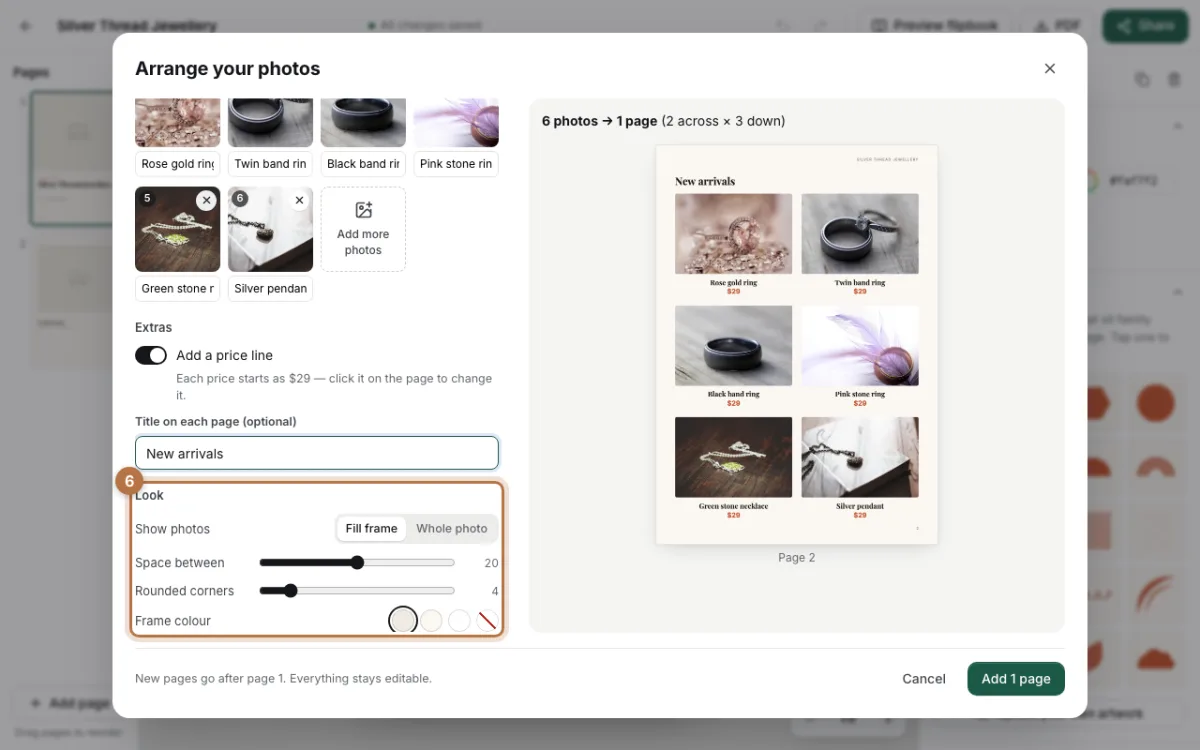
Step 6: Change the look
Under Look, you can change how the photos sit on the page:
- Fill frame fills each box with the photo. The edges may be cut a little.
- Whole photo shows each full photo, with nothing cut off.
- Space between sets the gap between photos.
- Rounded corners makes the photo corners round.
- Frame colour sets the colour behind each photo.
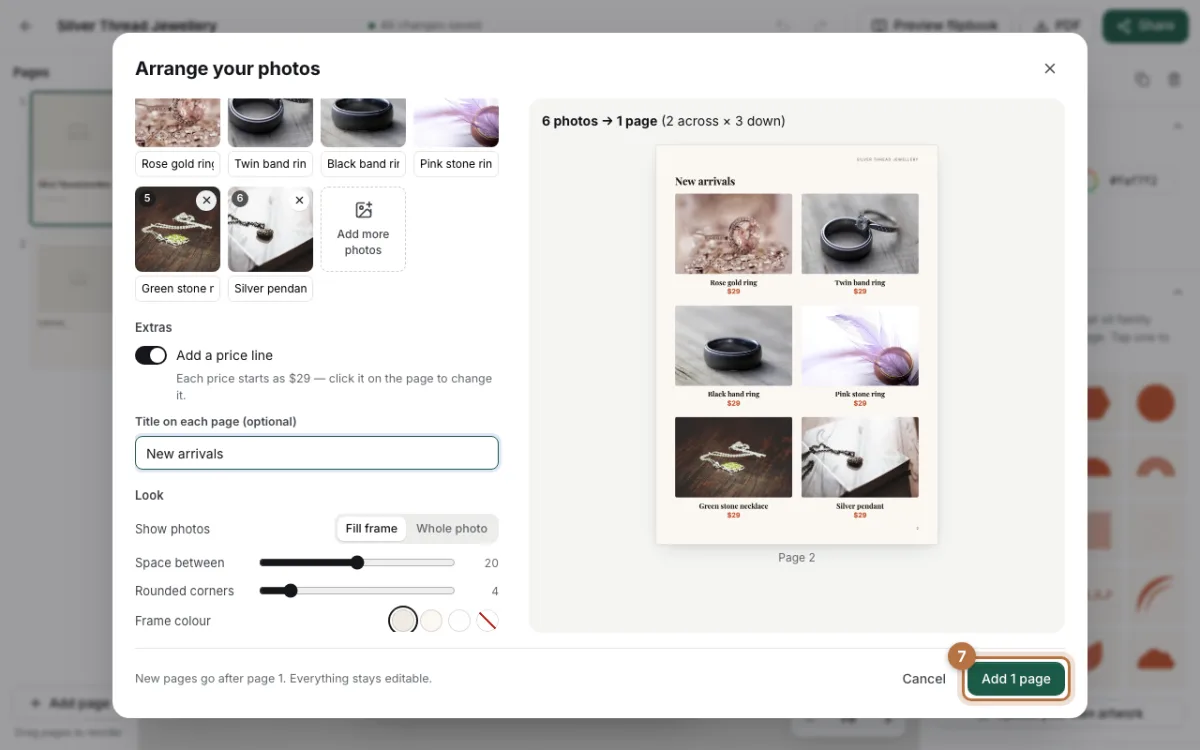
Step 7: Add the page
Click Add 1 page at the bottom. If you have more photos than fit on one page, CatalogLeaf makes more pages. The button then says how many, like Add 3 pages.
Your finished photo grid page
Here is the jewellery page from this guide:
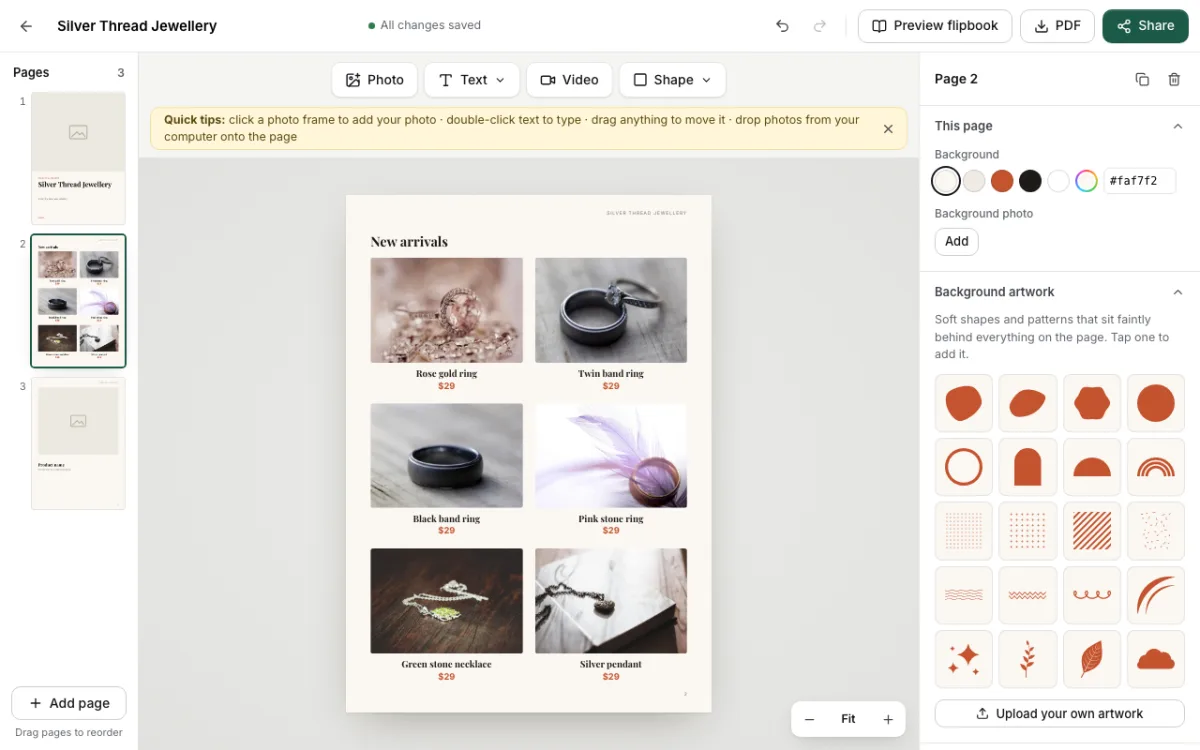
Every photo has the same size, with its name and price below it. Now click each price on the page and type the right amount. You can also move or change any photo or text, like on any other page.
Tips for a better photo grid
- Use photos with the same kind of background. The page looks calmer.
- Keep names short, so each one fits on one line.
- For small items, try 3 or 4 photos across. For big items, use 2.
- Want a quicker way? In the editor, click Photo at the top and choose two or more photos. The same window opens.
- Need more photos of one product instead? Read how to add more photos to one product.
When your pages are ready, you can download a PDF or share your digital catalogue as a link.
Ready to try? Start a new catalog and add your first photo grid page.